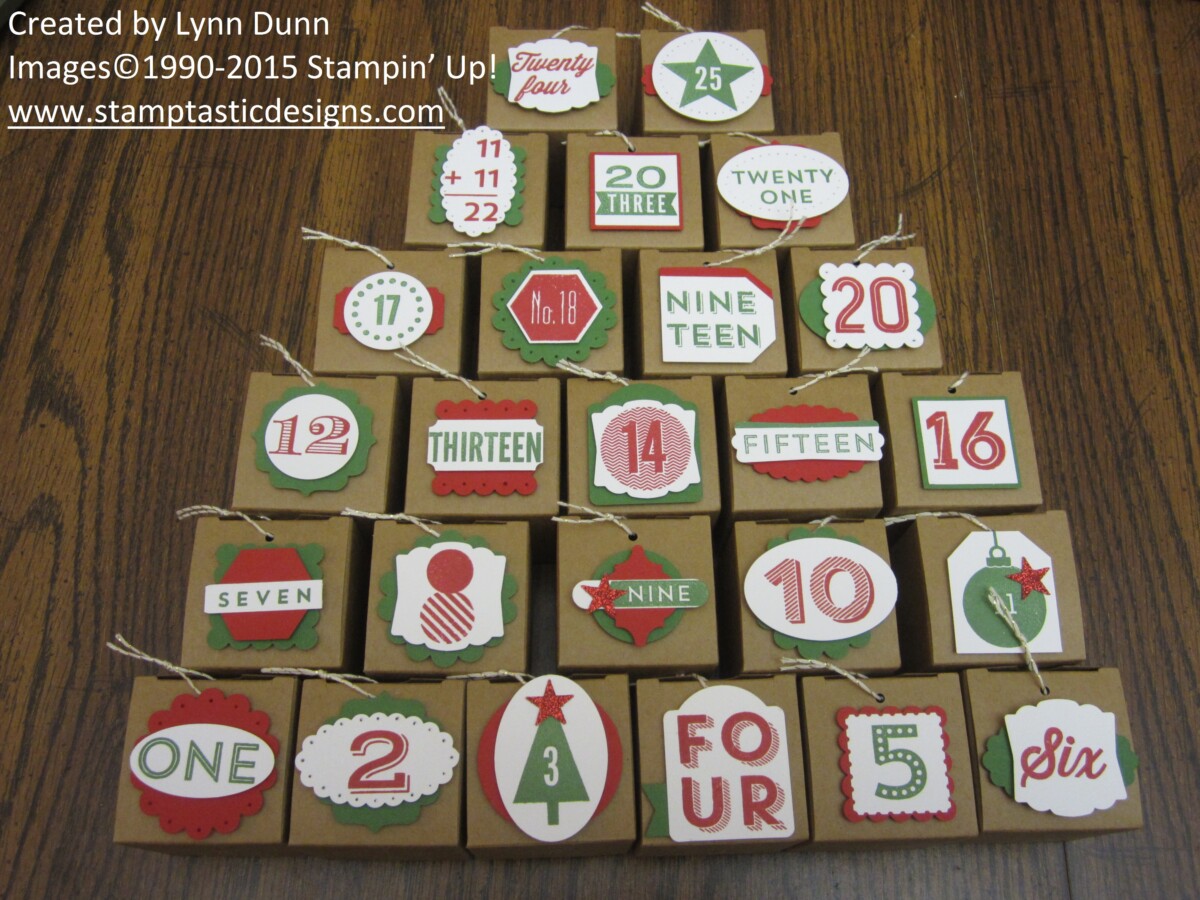
Today I want to share one of my favorite holiday projects with you! Yep, it’s an advent calendar. And…a quick and simple one at that! If you have seen the 2014 Stampin’ Up! Holiday catalog then you may have noticed the fun little advent calendar they put together with the tiny treat boxes and 25 Days photopolymer stamp set. The images in the 25 Days set fit perfectly onto the top of the tiny treat boxes. Each treat box is 2 x 2 which means there are a variety of punches you can use to create different shapes to decorate the 25 days in your advent calendar. You can make this project as simple or as detailed as you like! Here are some of things that I did to create this fun advent calendar:
1) Stamp all of the “odd” numbers in the calendar using garden green ink
2) Stamp all of the “even” numbers in the calendar using real red ink
3) Grab your favorite punches or use a variety of punches to cut out the numbers for your calendar and/or to add a matte or background to the numbers.
4) Secure all of the advent calendar numbers and decor to the tops of the boxes with dimensionals.
5) For the final touch, I will be placing the advent calendar inside a large shadow box…which is why I added baker’s twine to each of the box lids. Punch a small hole in the top and lid of each box and thread the baker’s twine through. This will make the boxes very easy to open without ripping them.
Enjoy!

Product List


Hi Lynn, how many 2 x 2 x 2 boxes come per order for $6.95. Thanks
Hi Cheryl, There are 25 boxes in each package for $6.95
Hi Lynn, Thanks for the information. Have a great evening. C
You are very welcome! Have a great week!