Hello Stampin Friends! Today I have another fun “love themed” project to share and a great way to use your photopolymer stamps. This particular project showcases the Delicate Details stamp set which is one of the FREE products you can choose, with a qualifying order, during Sale-a-bration. Since I really love all things lacy and girlie, the Delicate Details stamp set was the first item on my Sale-a-bration list! There are so many fun things that you can do with it!

This card was super simple to create! To make this card, start with a piece of basic black cardstock for the base of your card. Cut a 5-1/4 x 4 inch piece of whisper white cardstock. Grab your favorite ink color…in this case I used Real Red since I was busy making Valentine’s all week. However, you can use any color you prefer. And you can also use this design to create cards for just about any occasion, just change out the sentiment!
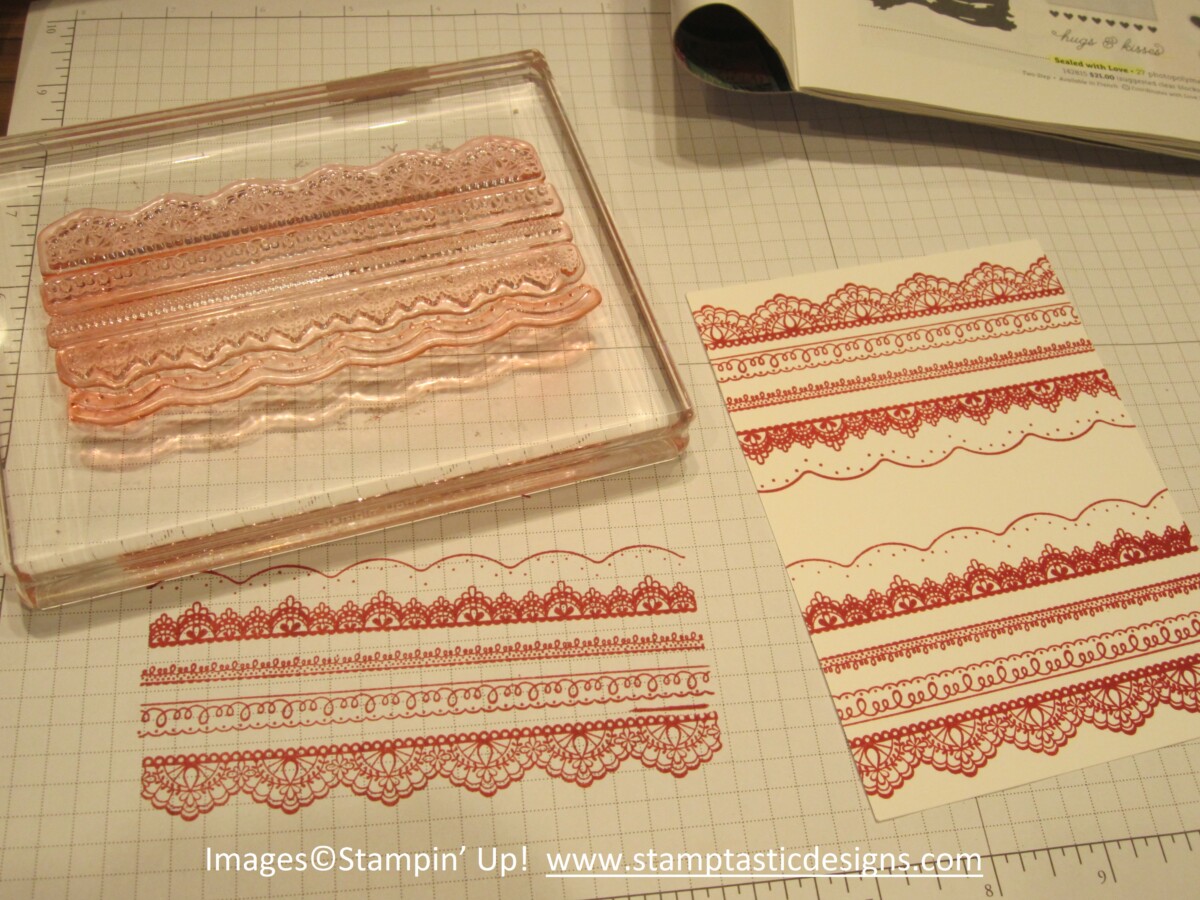 So you might have noticed that the Delicate Details stamp set has 5 different stamp images. Now you can stamp each image individually on your card or…you can stamp them all at once (which is the method I prefer). Simply lay all of the stamp images on your crafting table. Arrange them in any order that you prefer but be sure the flat surface is facing upwards and the image is facing downwards (on your table). I arranged them as close together as possible. Once you have the layout you like, take a large clear acrylic block and press it down onto all of the photopolymer stamps. When you pick up the block, your stamps will be neatly arranged and ready for stamping! I love this little trick because the images will be identical no matter how many times I stamp them!
Lay the block down, as shown, and ink up the images with your preferred color. Practice stamping the images on a scrap piece of paper to ensure they appear the way you would like them to. If not, simply re-adjust them and practice again. When you are ready, take the white cardstock you cut earlier, ink up the images, and stamp them on the top of the cardstock, then re-ink the images and stamp them on the bottom of the cardstock. Leave a little space in the middle to stamp a sentiment! For the finishing touch, embellish with some rhinestones and silver glimmer hearts! Enjoy!
Product List


